Friday, October 31, 2014

Best Halloween Movies for Families of all Ages

Best (Family Friendly) Halloween Movies


There are tons of Halloween movies out there, some cheesy, some horrifically scary and some fun ones!

Here's a list of my favorites, starting with little kid friendly and going up to more teenage kid appropriate ones! 


They're not all the one's you might expect but I promise they'll all put you in the perfect Halloween mood!

Snuggle up with your bucket of candy and enjoy these great Halloween movies!


Image result for despicable me Despicable Me

Image result for monsters inc Monsters, Inc.


Curious George: A Halloween Boo Fest This movie is adorable! In fact we're watching it right now at my house for maybe the 5th time this week! The songs are great too!


 Cinderella


 I love this Rogers and Hammerstein version of Cinderella


Image result for wizard of ozWizard of Oz


 Arsenic and Old Lace- my ALL TIME FAVORITE Halloween movie! It won't be Halloween unless I watch this hilariously spooky old classic!


Image result for ghost and mr chicken The Ghost and Mr. Chicken, another old Halloween classic


Image result for hocus pocus Hocus Pocus- this fun movie needs no explanation!


Any Adams Family episode will put you in the mood!


 Harry Potter- love the way they do up Halloween in these movies!


 Twighlight series


Image result for clue Clue


 Once Upon a Time- I confess I'm absolutely in love with this TV series! Make sure you have lots of time on your hands because once you start you might not be able to stop at just one episode!


I searched Halloween in Hulu and get lots of Halloween episodes of your favorite TV shows including The Cosby Show, Garfield, The Middle and tons more!

What are your favorite Halloween classics?

Thursday, October 30, 2014

Chic Pool Noodle and T-shirt Wreath


DIY Halloween Wreath

Made with T-shirts and a Pool Noodle!


One afternoon my friend and I were scrolling through Pinterest for a quick and festive Halloween craft idea. When we found this adorable yarn door wreath we knew we just had to make one for ourselves!

I stocked up on pool noodles when they went on clearance knowing that wreath making season was soon to be upon us and I always have yarn and other craft materials on hand so we went straight to work. 

We worked our pool noodles out, making sure they were flexible enough to give us a perfect circle. I didn't add a dowel or any inner support to mine and you can see it's already begun to sag from the top. Make sure you don't skip out on that step. 

I got distracted by kids while my friend started wrapping her yarn. I watched as she wrapped and wrapped and wrapped and wrapped. That did not look like fun to me. I knew if I got started that I would never finish. I'm not that patient I guess. So I dug through my craft box for something easier. 

I found 2 t-shirts and thought- YES! Perfect! 
I love crafting with t-shirts since they don't fray and you can do virtually anything with them. I got these  black and white 3XL shirts for $0.50 at Walmart a while back. They had more than enough fabric to them so I cut them up. 

I cut 6 rectangles about 4 x 6 inches out of each t-shirt. I wrapped each rectangle around the pool noodle then hot glued it on to it self. Be careful because the hot glue melts the pool noodle away pretty quick. I made sure to tuck the edge of each t-shirt piece in under the one beside it for a cleaner look. 

I added black tulle and orange fabric flowers and was done long before my friend even got half way around with her wreath. 

If you're not one for spending all night wrapping yarn try a t-shirt wreath next time you're in a crafting mood! 


Happy Halloween!


Costume Boot Covers

Knight/Prince Costume Boot Covers


1.) Start with a pair of shoes you don't plan on using until you're all done with the costume. They won't be damaged at all, it's just that getting them in and out of the boot cover is a little work. 

2.) Lay a shoe down sideways on a sturdy piece of fabric (doesn't have to be felt or anything too thick though). Determine how tall you want the boots to be and draw an outline around the shoe. If you'd like the boot to fold over for a cuff make the top be extra long and extra wide. 


3.) Cut four of this shape. Make sure you flip the pattern over for two of the sides if your material has a definite front/back.


4.) Pin two boot shapes together with right sides touching. Sew down front and back sides leaving bottom and top edges open. Don't forget to back stick to reinforce seems.

5.) Turn right side out and try on with shoe. Slide the shoe in through either the top or the bottom open edges. Adjust if needed.

6.) Repeat for other boot.

7.) Add some trim by either folding the top edge down and hemming for a cuff or make a prince style boot as shown below. I cut two triangle shapes then glued them on to the top edge of the boot. I glued ribbon trim around the upper edge of the boot.


8.) Now that you have the top part finished, cut around the bottom edge of the shoe and glue elastic or scrap pieces of fabric to the under sides to hold them on and tight as needed.


And there you have it! Easy costume boot covers!


Easy Layered Tunic Tutorial

To go along with our  Medieval Knights and Princesses Halloween theme this year I dressed my husband up with a hooded cape, easy 
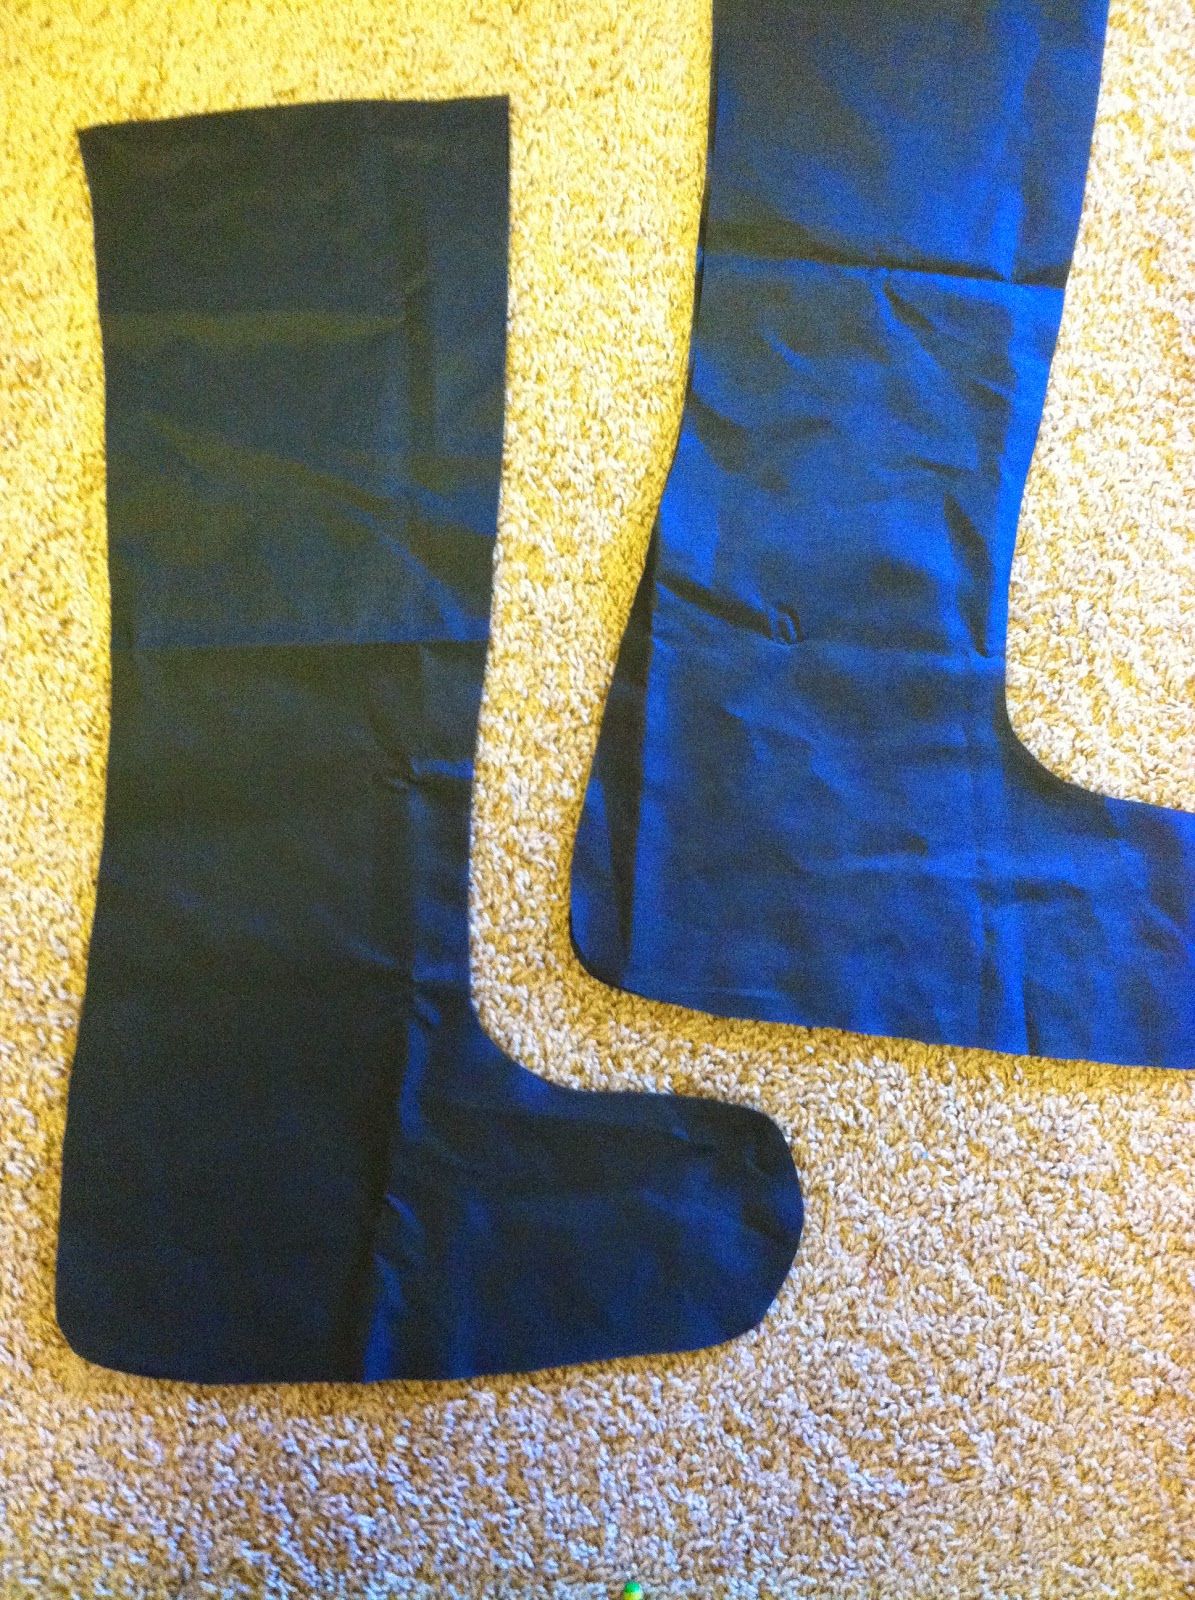
boot covers and this simple tunic.

This tunic is very similar to the sharpie art tunic I made for my son's no-sew king costume with just a few differences.

No -sew Renaissance period layered tunic


1.) Start off with a doubled over the top piece of fabric that is as wide as the shoulders and as long as the neck to mid thigh.

2.) Keep the fabric doubled over and then fold in half the opposite way (lengthwise) to cut the neck hole. Start a few inches down from the top on the center fold and cut a quarter-circle out of all four layers at once. When you open up the folds you will have a circle for the head to go through. If it is not big enough make a small cut again until you get it just right. Be careful not to cut too big.

3.) If you want a double layered tunic repeat steps 1 and 2 with a coordinating fabric. Make the neckline of the top layer slightly bigger and the length of the bottom layer a few inches longer to allow you to see both layers.

4.) With the fabric folded once from the top and once lengthwise, cut from the shoulders slightly angled out to give the top tunic more shirt-like structure. If the fabric is too thick to cut all four layers at once you can just do two at a time, but doing it all at once is nice to help keep both sides the same. 

5.) On the top layer, determine where the waist line will be then cut a small triangle towards that line.

6.) Hem raw edges. I was lucky that both of my fabrics had the selvage edges on the bottom so I only bothered hemming the sides. Bias tape would look nice on the triangle cut out if you had a coordinating color or you could even make your own with any left over fabric you have.

7.) Add trim to the waist line or just use a belt. I hot glued left over rope trim I had from my window treatments.

Super simple. Great results.